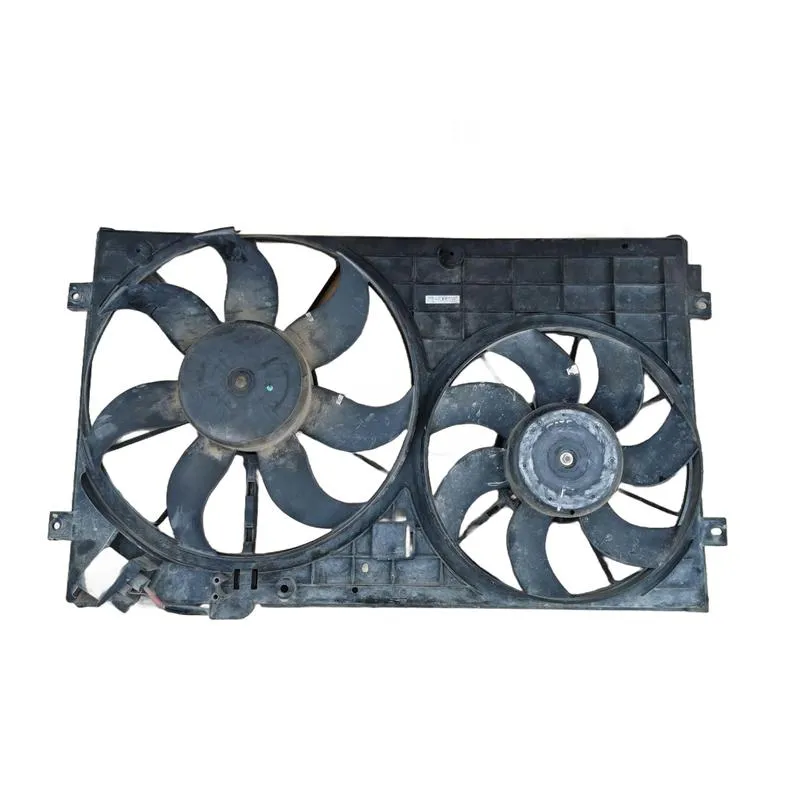
Understanding how your radiator fan system works is key to keeping your engine cool. Most Passats have two fans: a large one that cools the engine, and a smaller one that cools the air conditioning condenser.
The large fan turns on automatically when the engine coolant gets hotter than about 90°C (194°F), helping to keep your engine at a safe operating temperature.

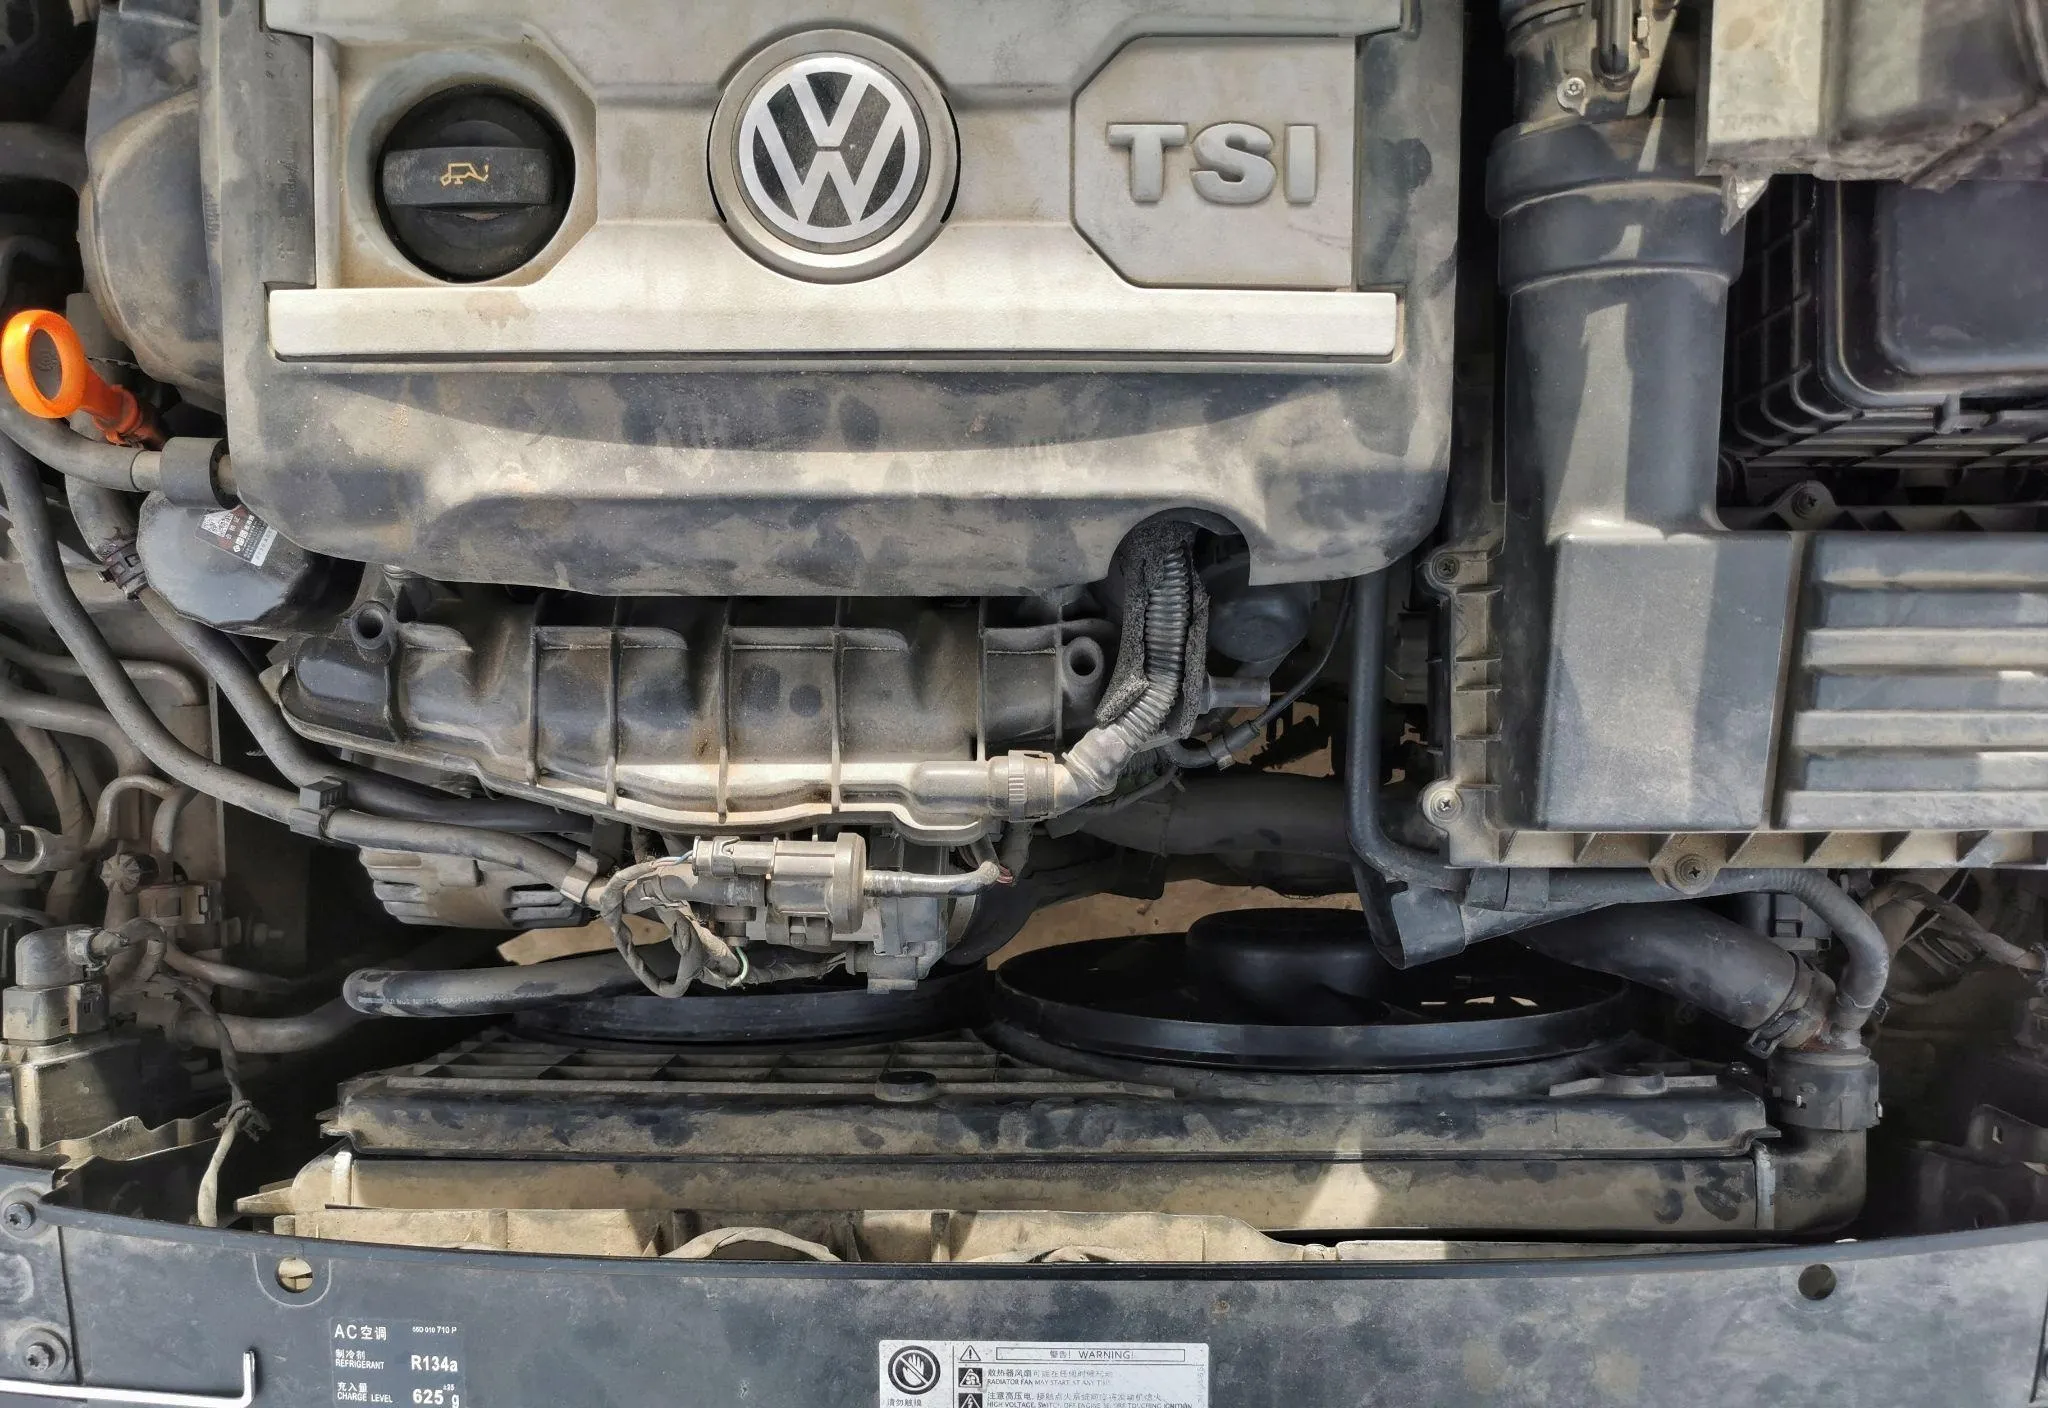
Where the Fan Assembly Is Located
The fan assembly is located right next to the radiator in the engine bay, behind the grille.

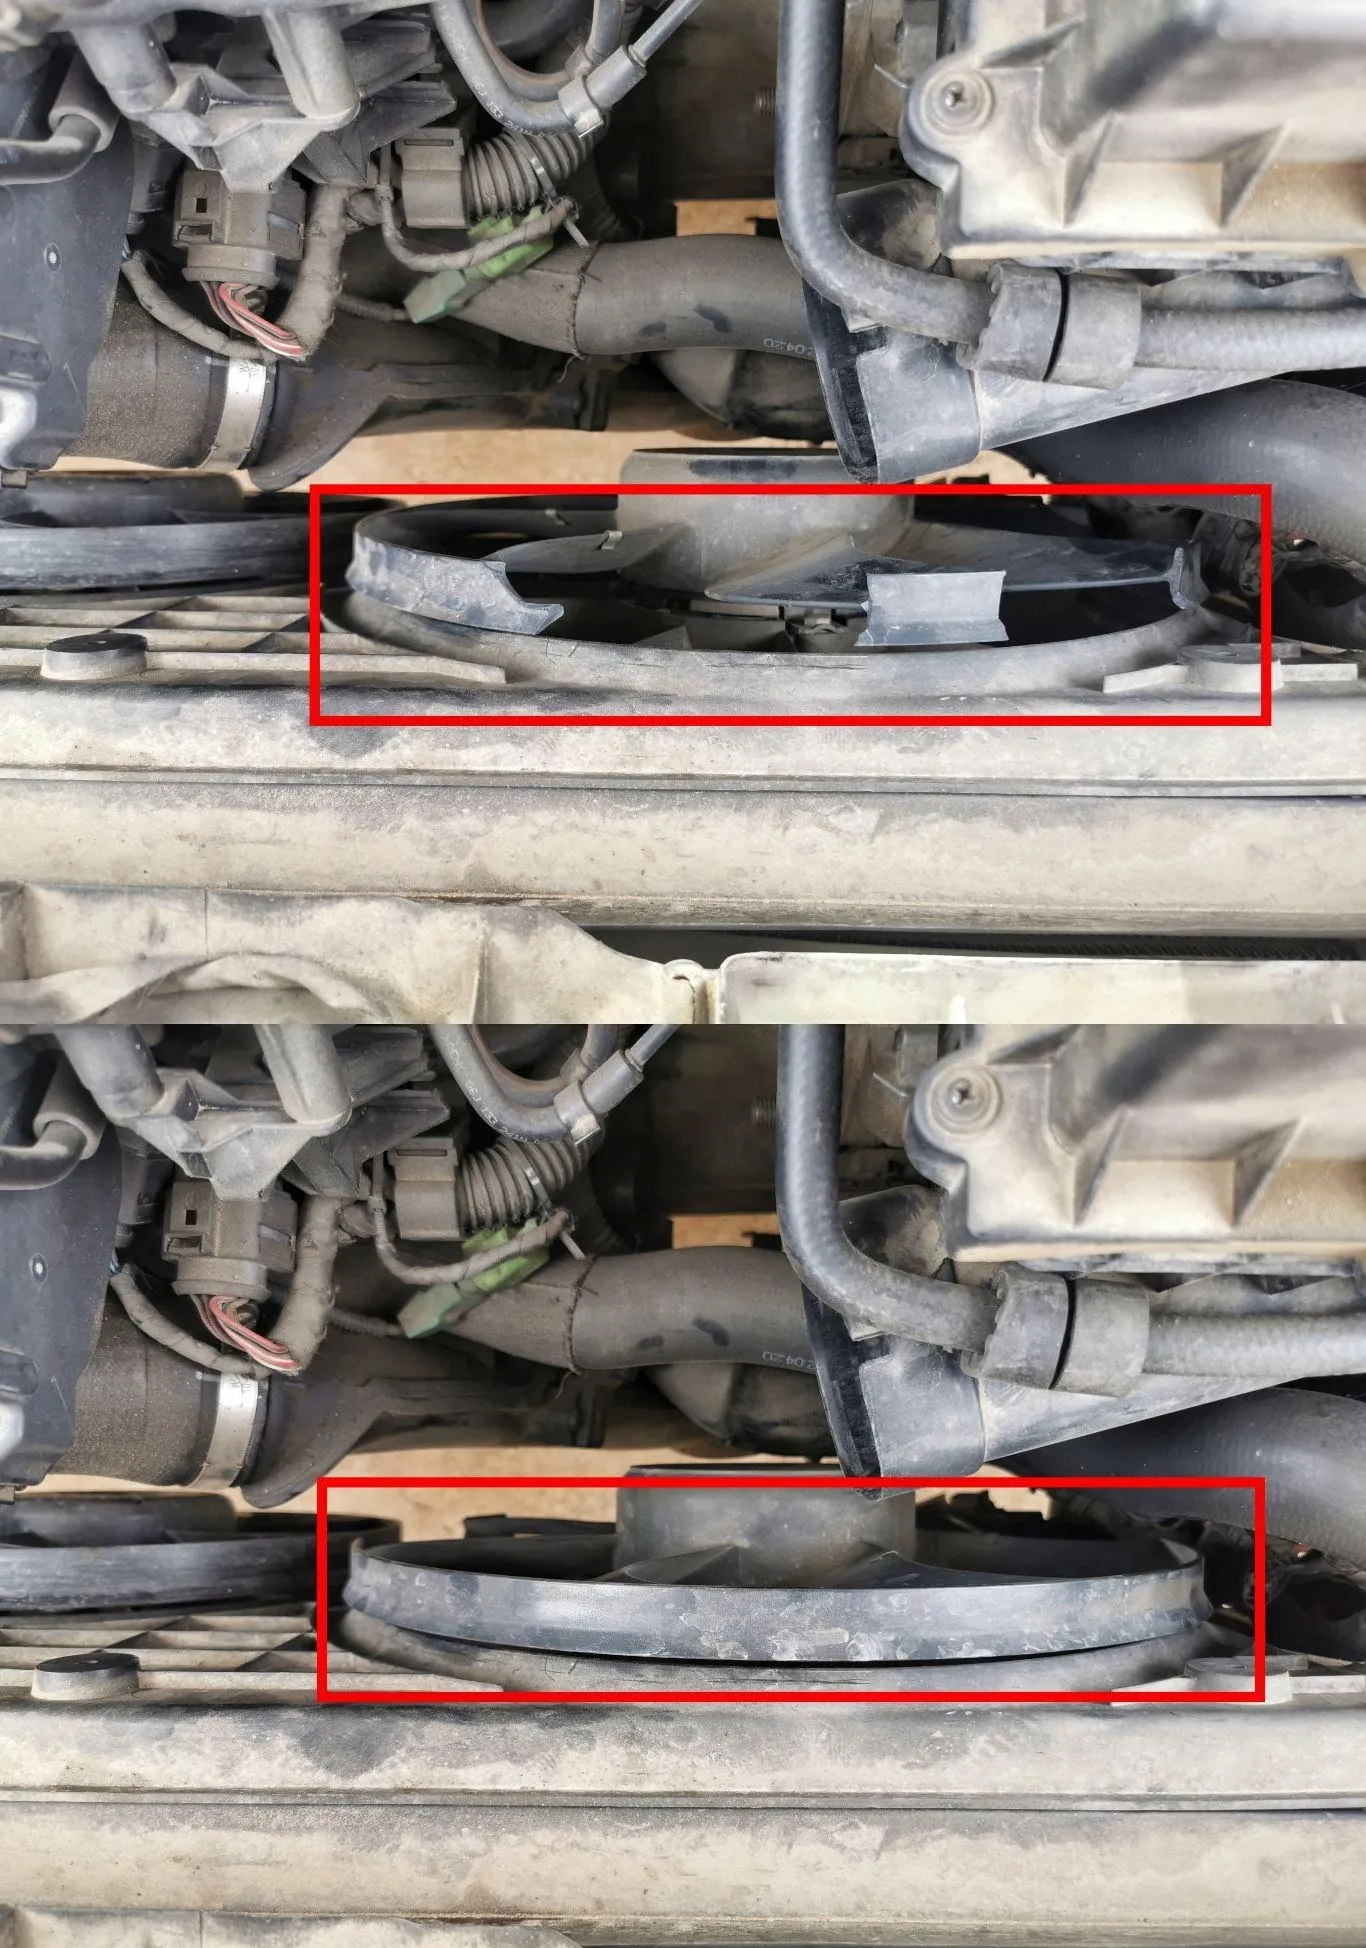
How to Tell If the Fan Is Damaged
Look closely at the large cooling fan. Even if most of the assembly looks fine, cracked or broken blades on the big fan will throw off its balance and reduce performance.
Removing the Old Fan Assembly
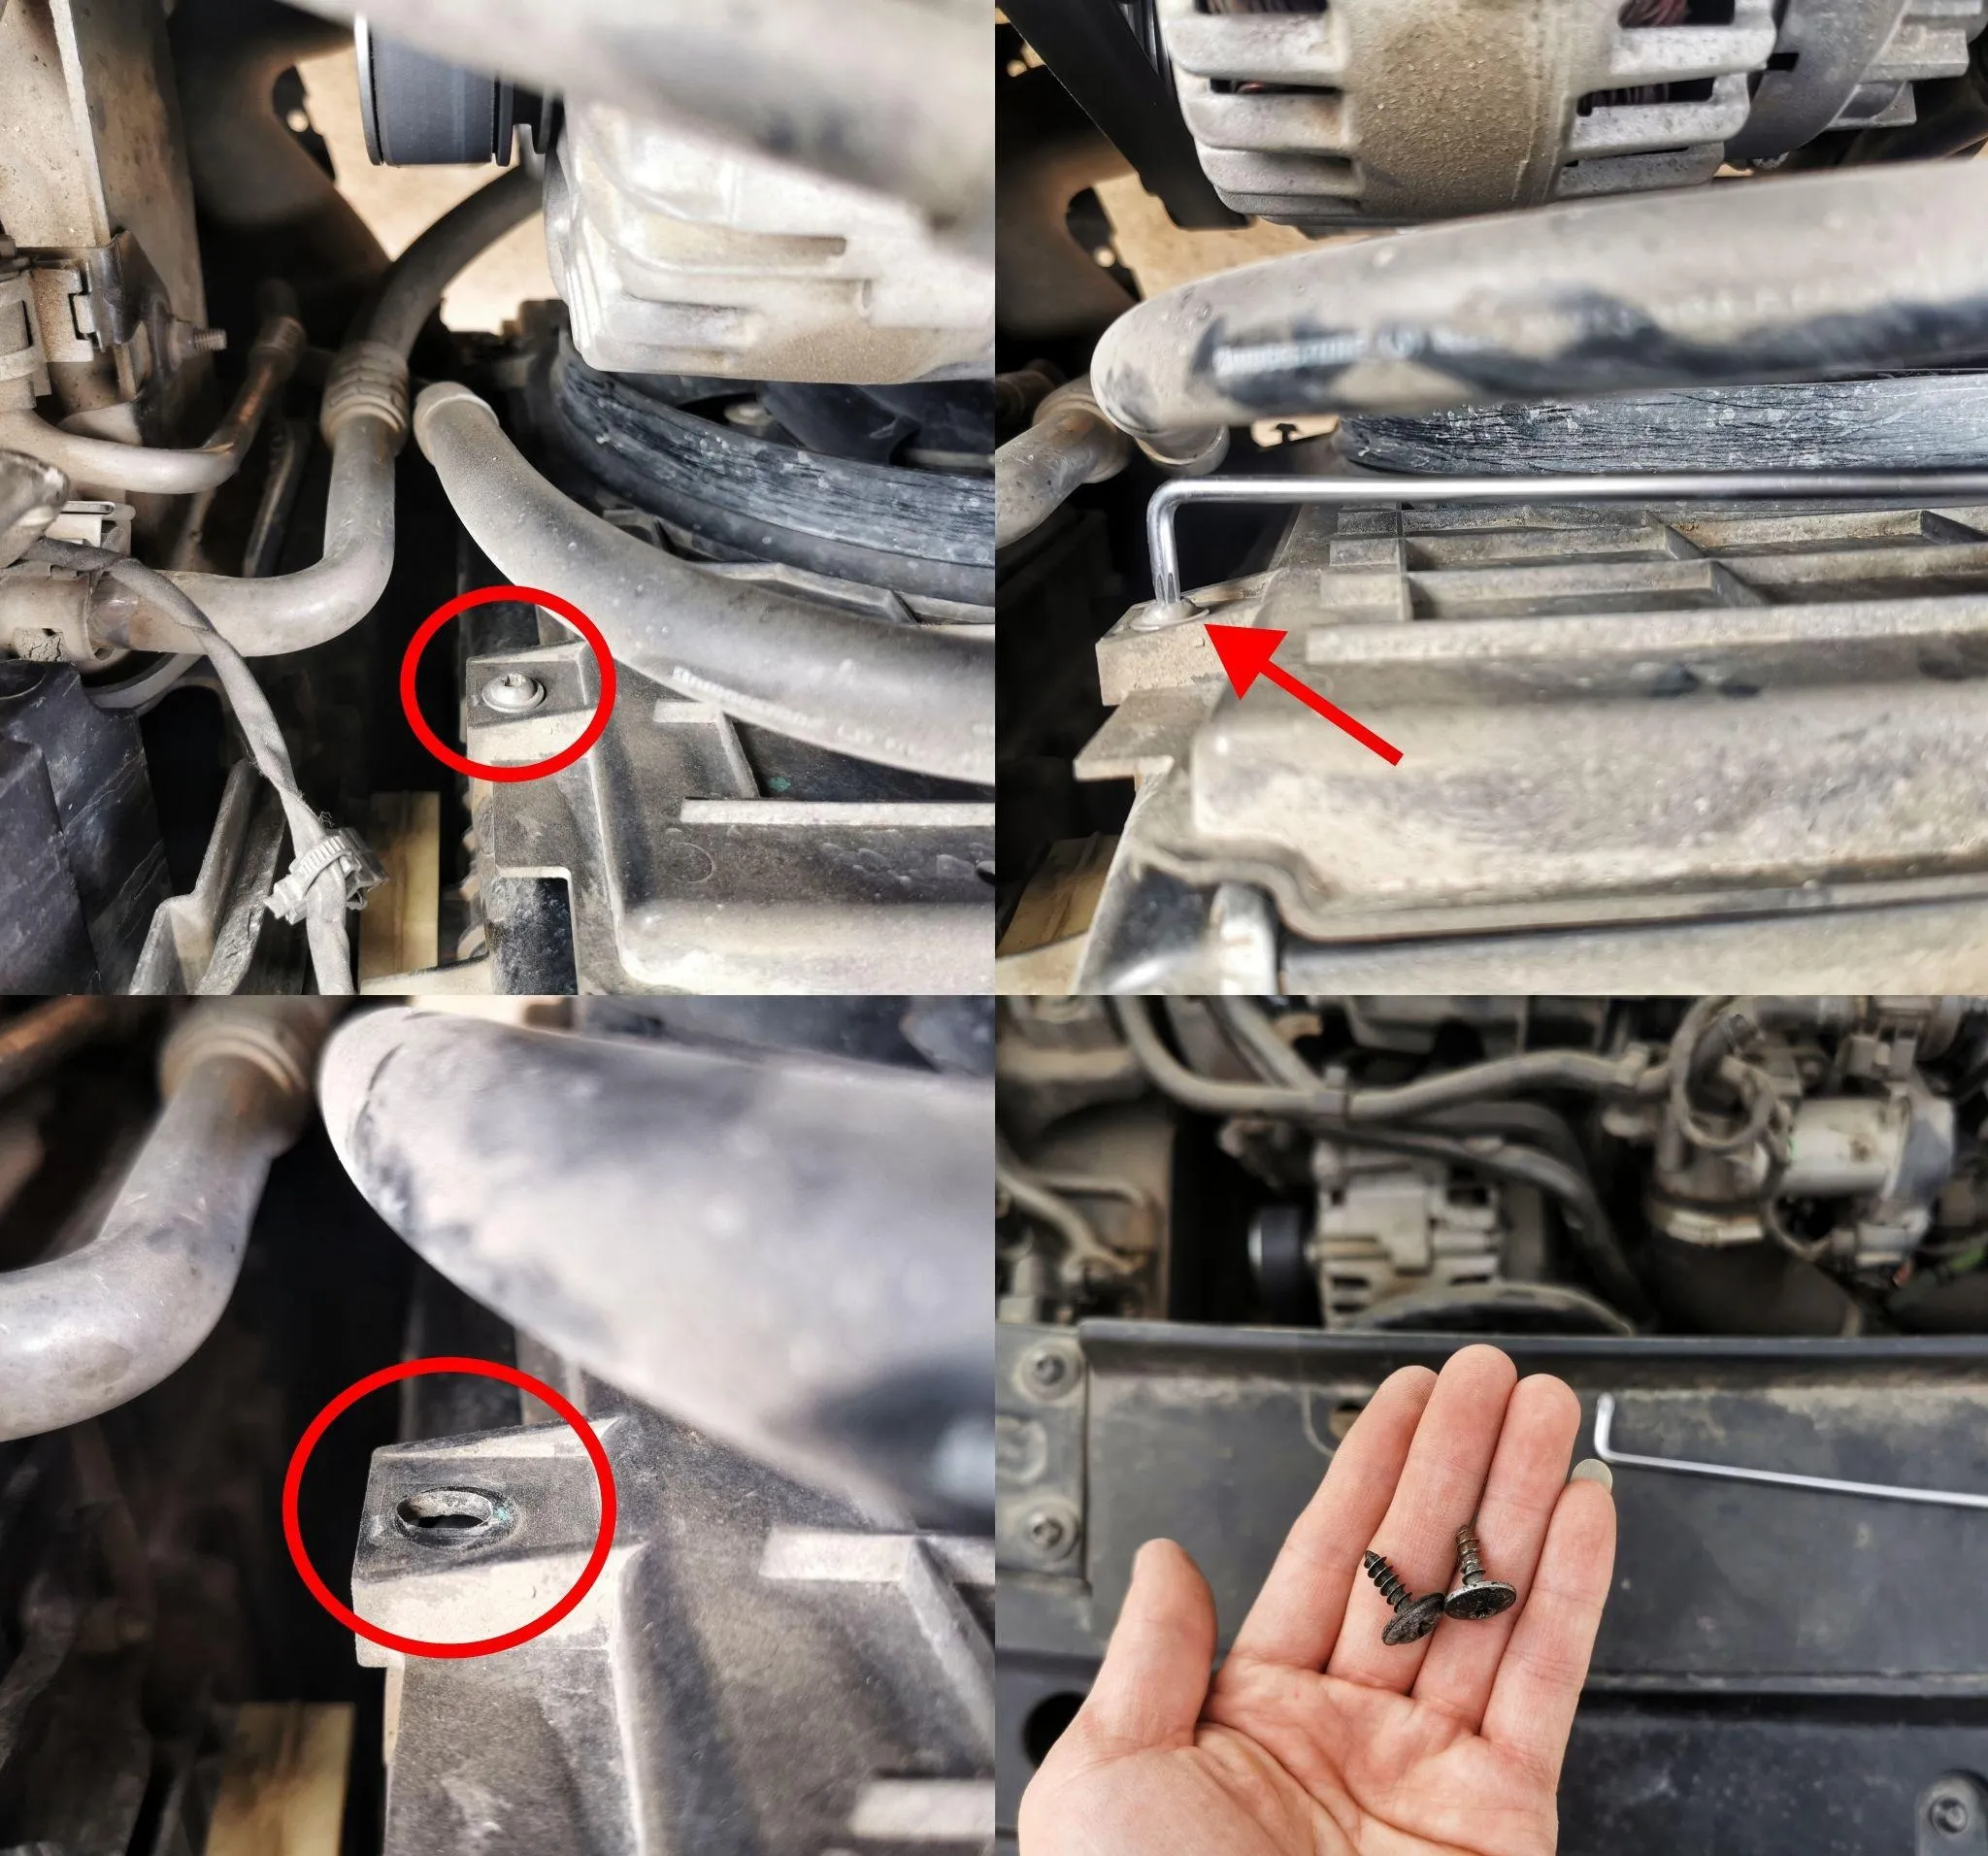
1. Locate and Remove the Fasteners
The assembly is held in place with four screws—two on the top, and two on the bottom of the radiator. The top two can be removed from above, but for the bottom two, you’ll need to access from under the car.
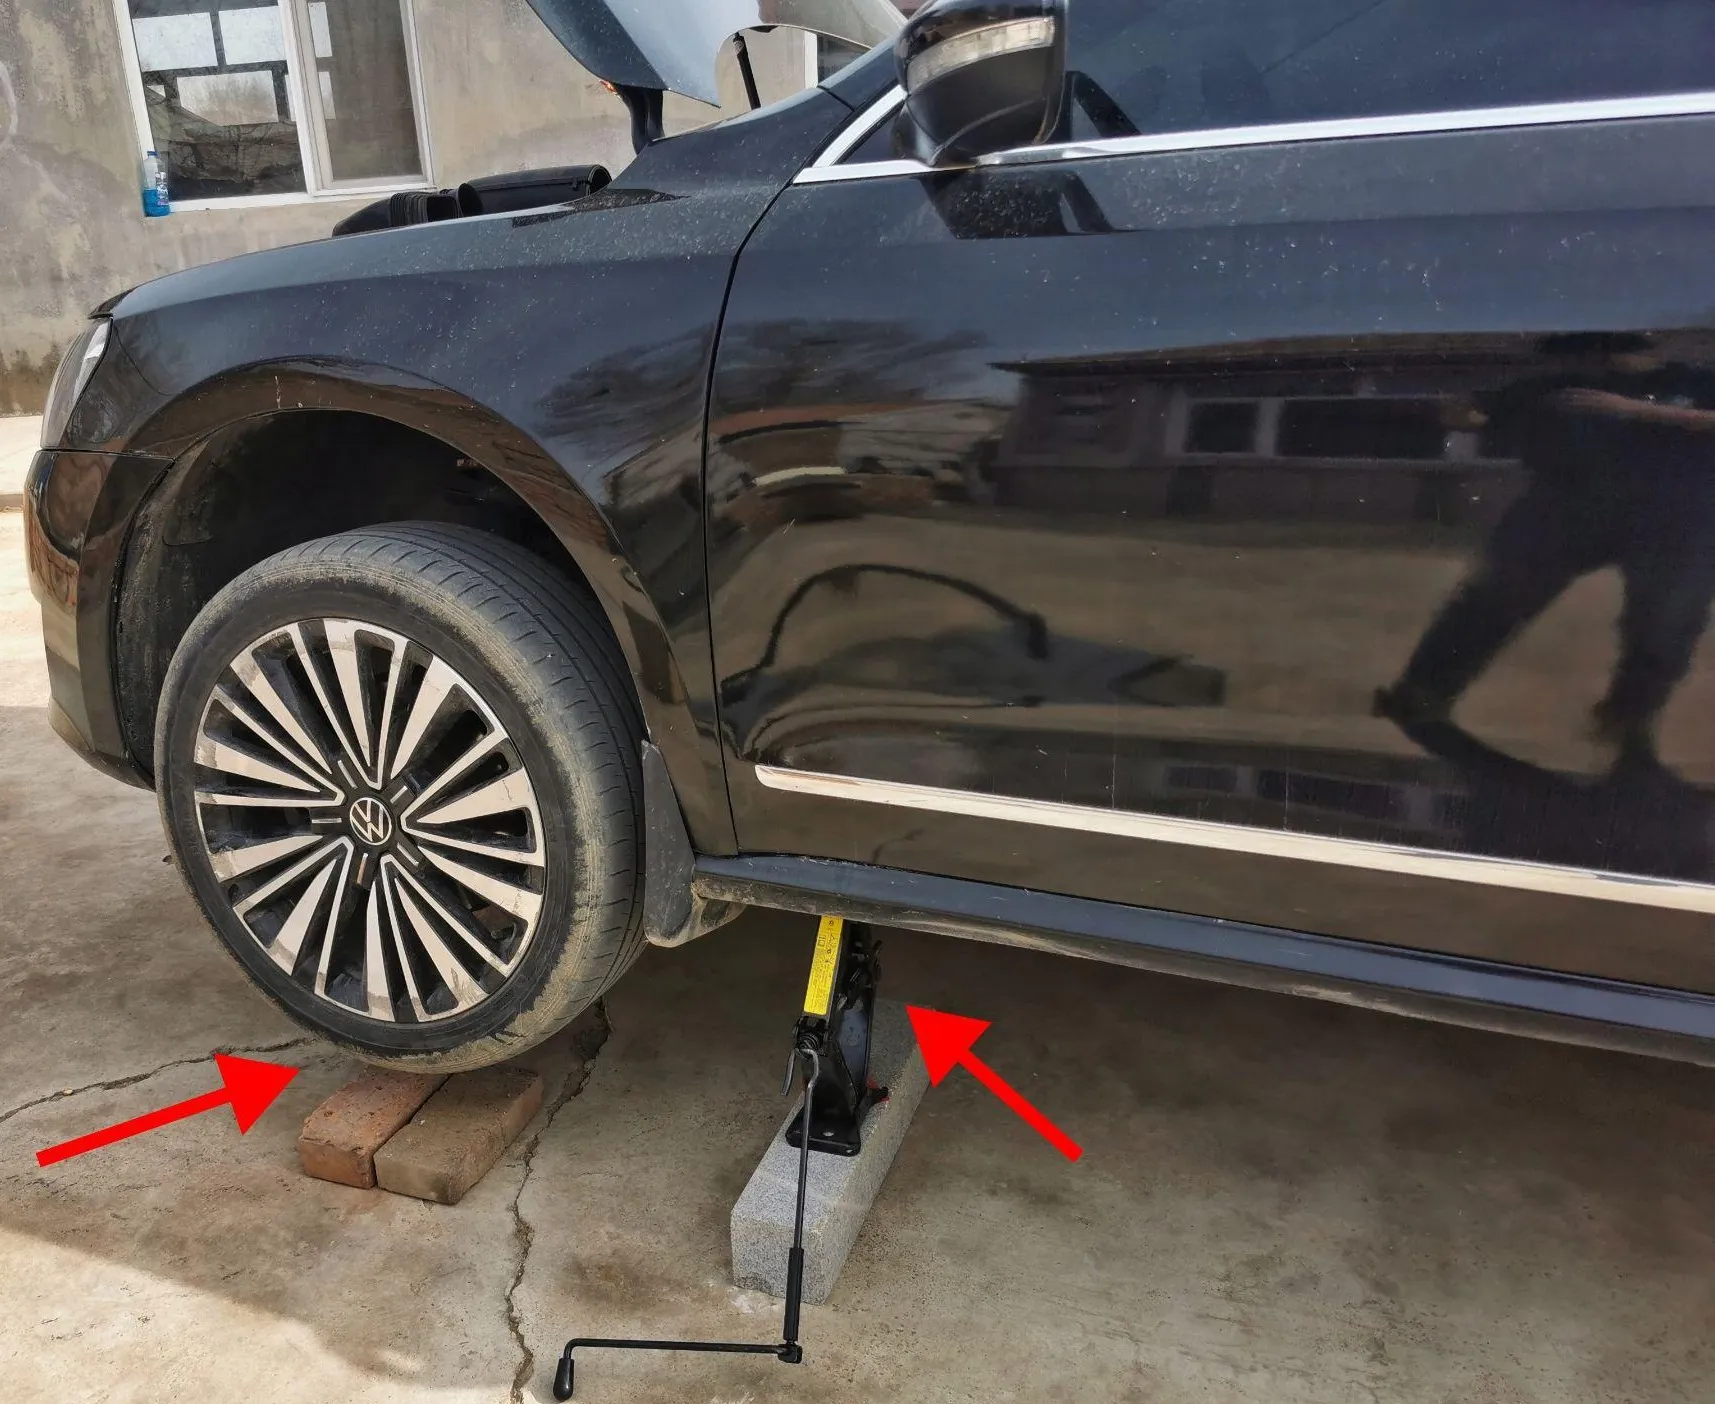
2. Raise the Vehicle
Use a jack or car lift to raise the vehicle. Make sure it’s secure. You’ll need room underneath to reach the lower screws and the power connection.
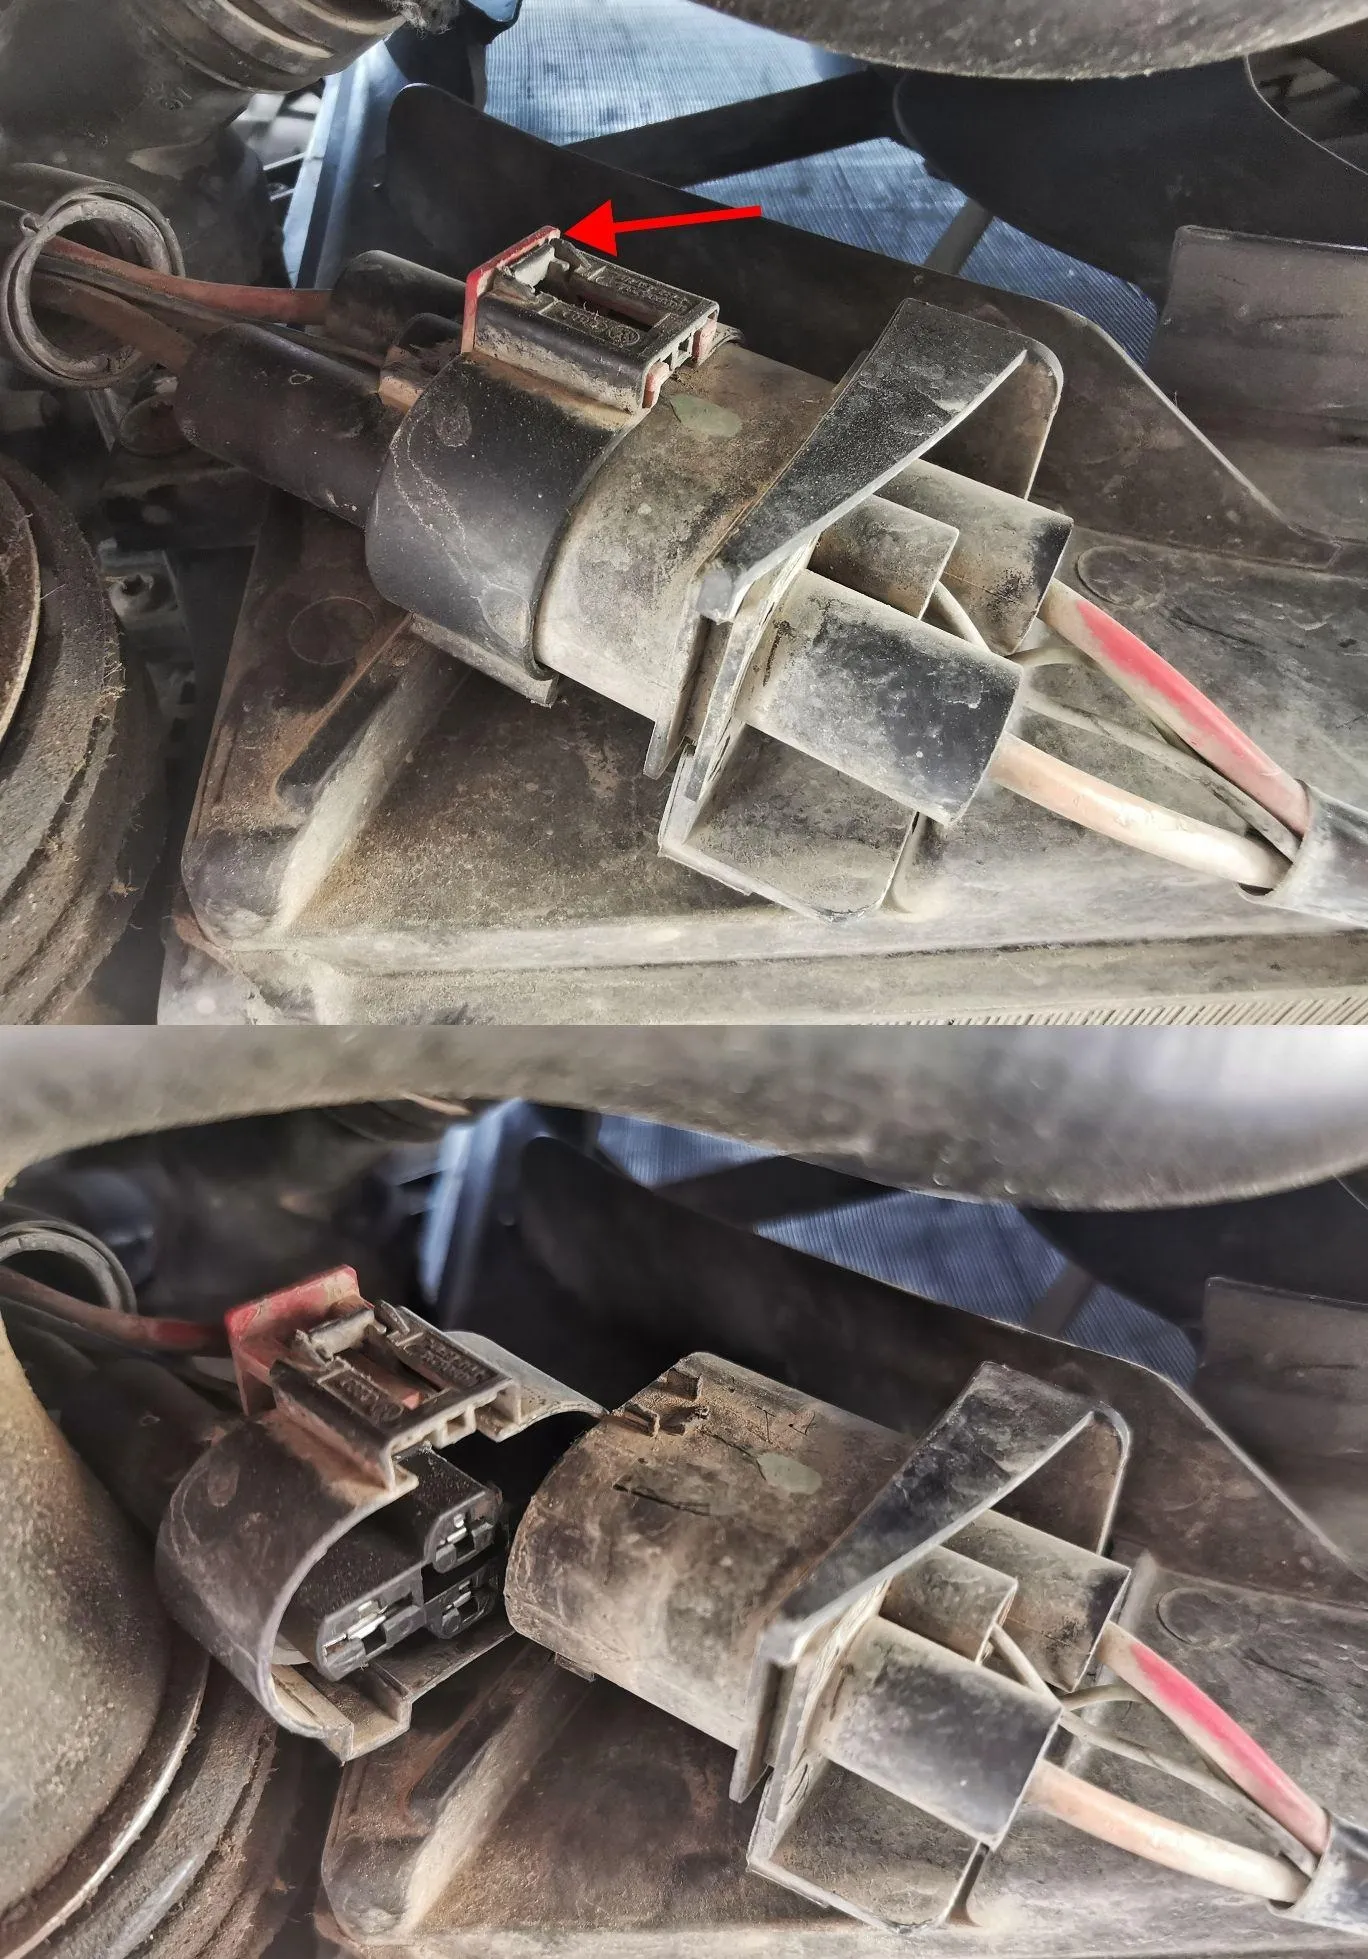
3. Disconnect Power and Lower Screws
From underneath, unplug the fan’s power connector. There’s a small locking tab—press it before pulling. Then remove the two bottom screws.
4. Remove the Fan Assembly
Once all four screws and the plug are removed, carefully lower the fan assembly out of the engine bay.
Disassembling the Fan Unit
The large fan (engine cooling) and small fan (A/C cooling) are usually part of one integrated unit. You have to remove the entire assembly to replace either fan.
1. Prepare the New Fan
Before installation, compare the new fan assembly to the old one. Make sure screw positions, plug connectors, and fan sizes all match.
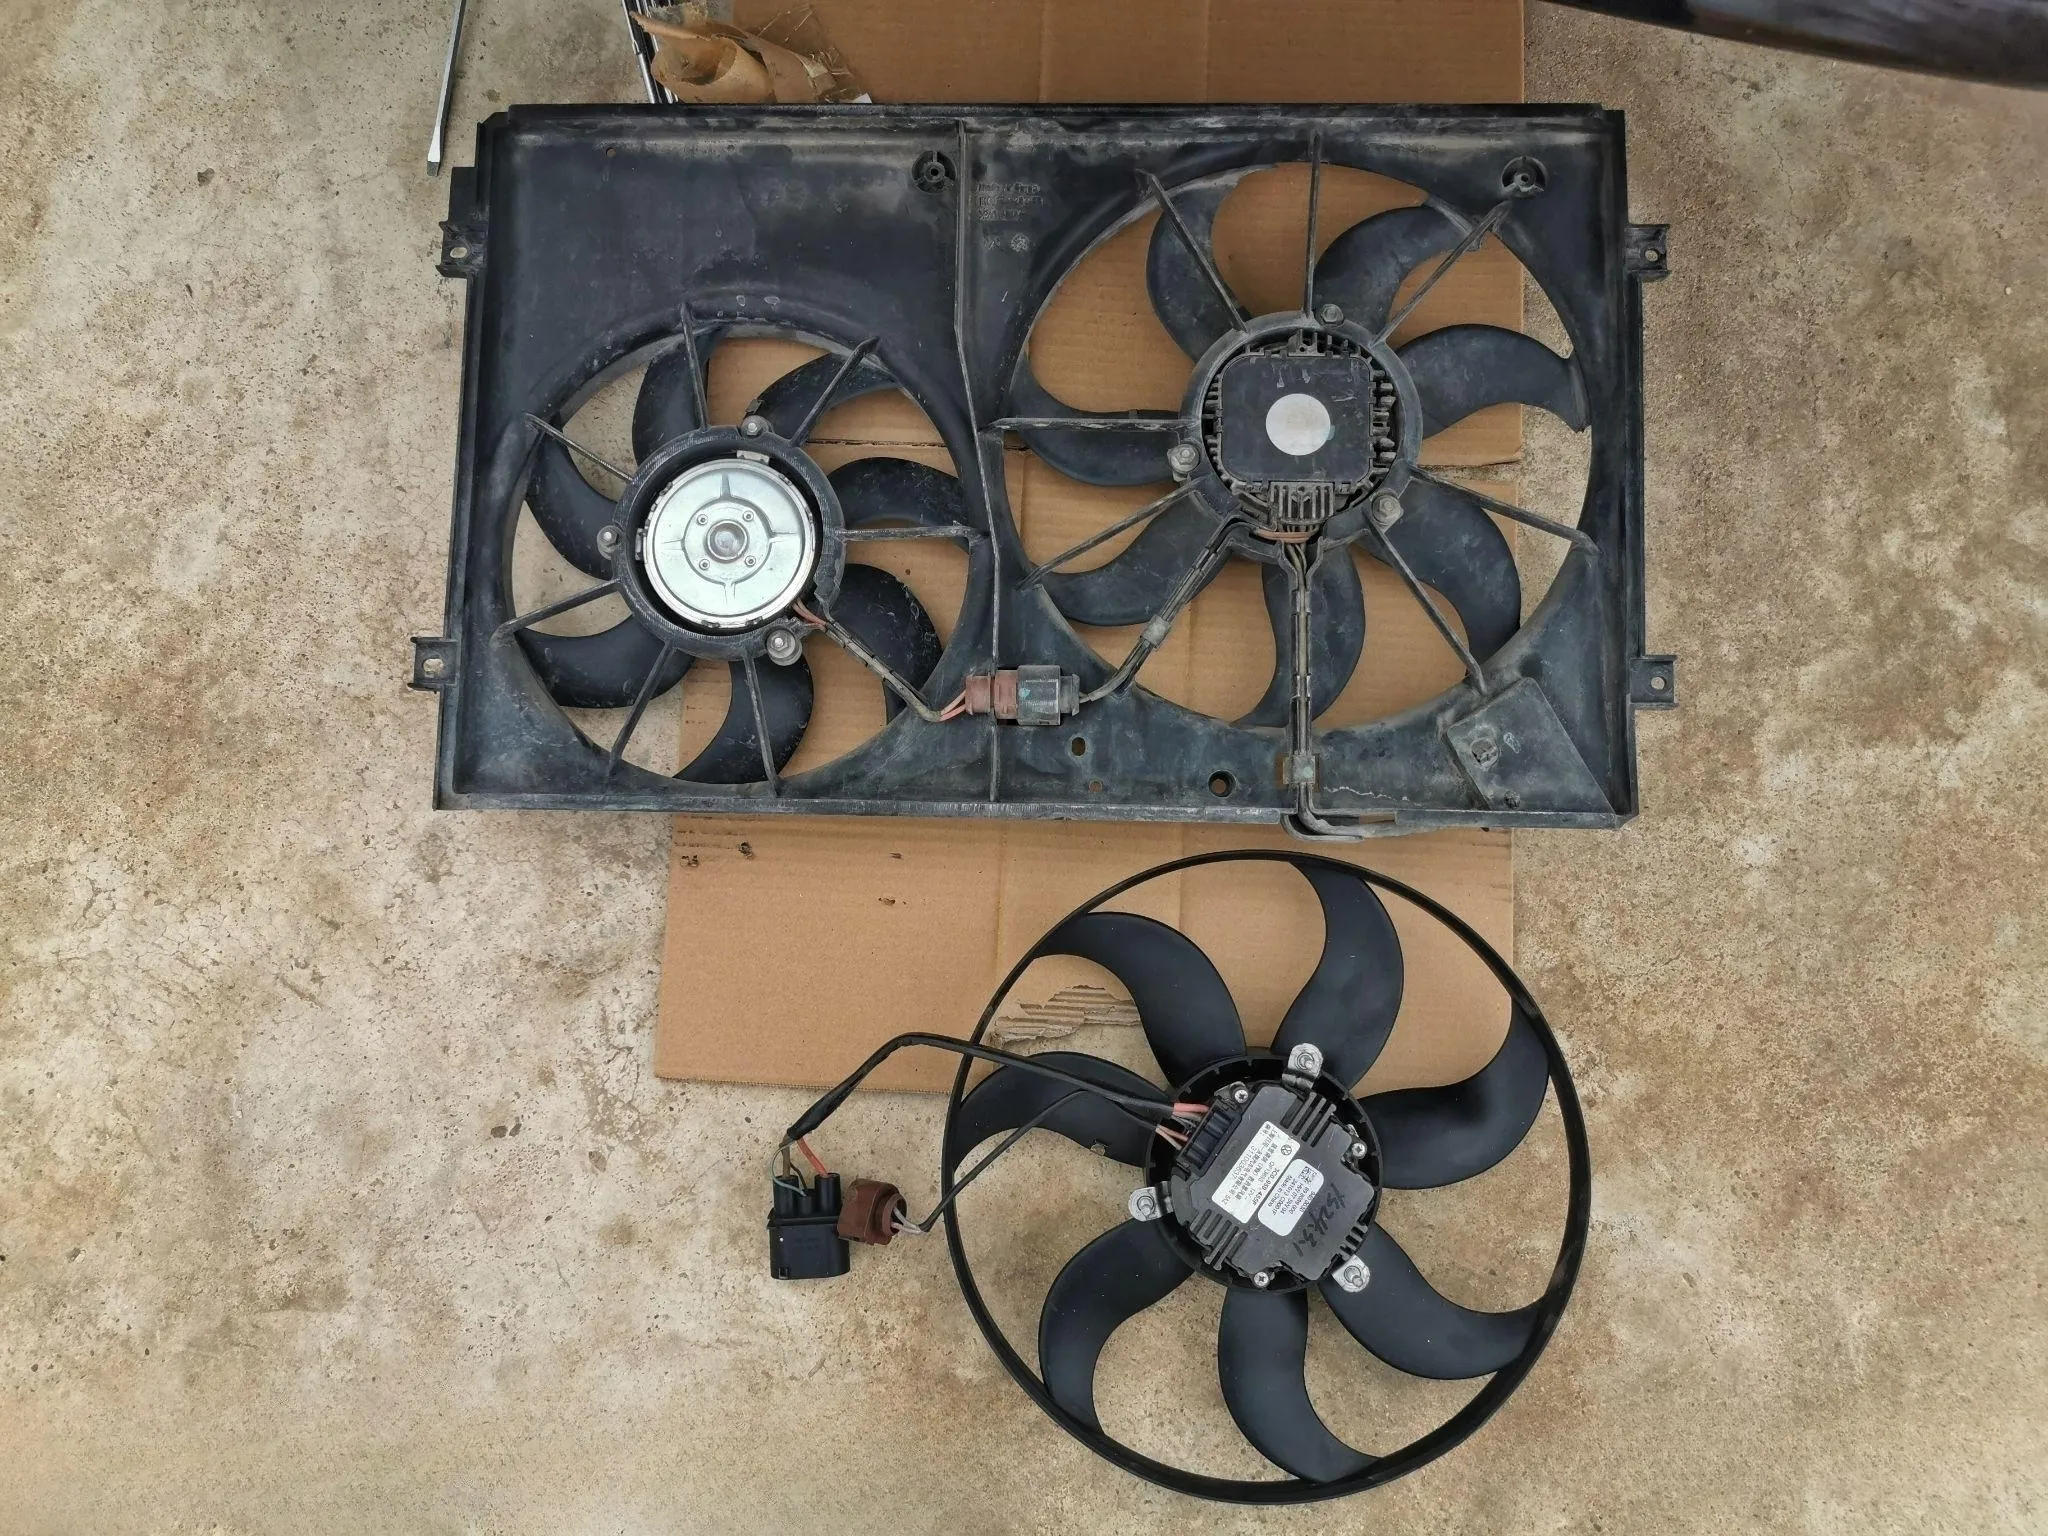
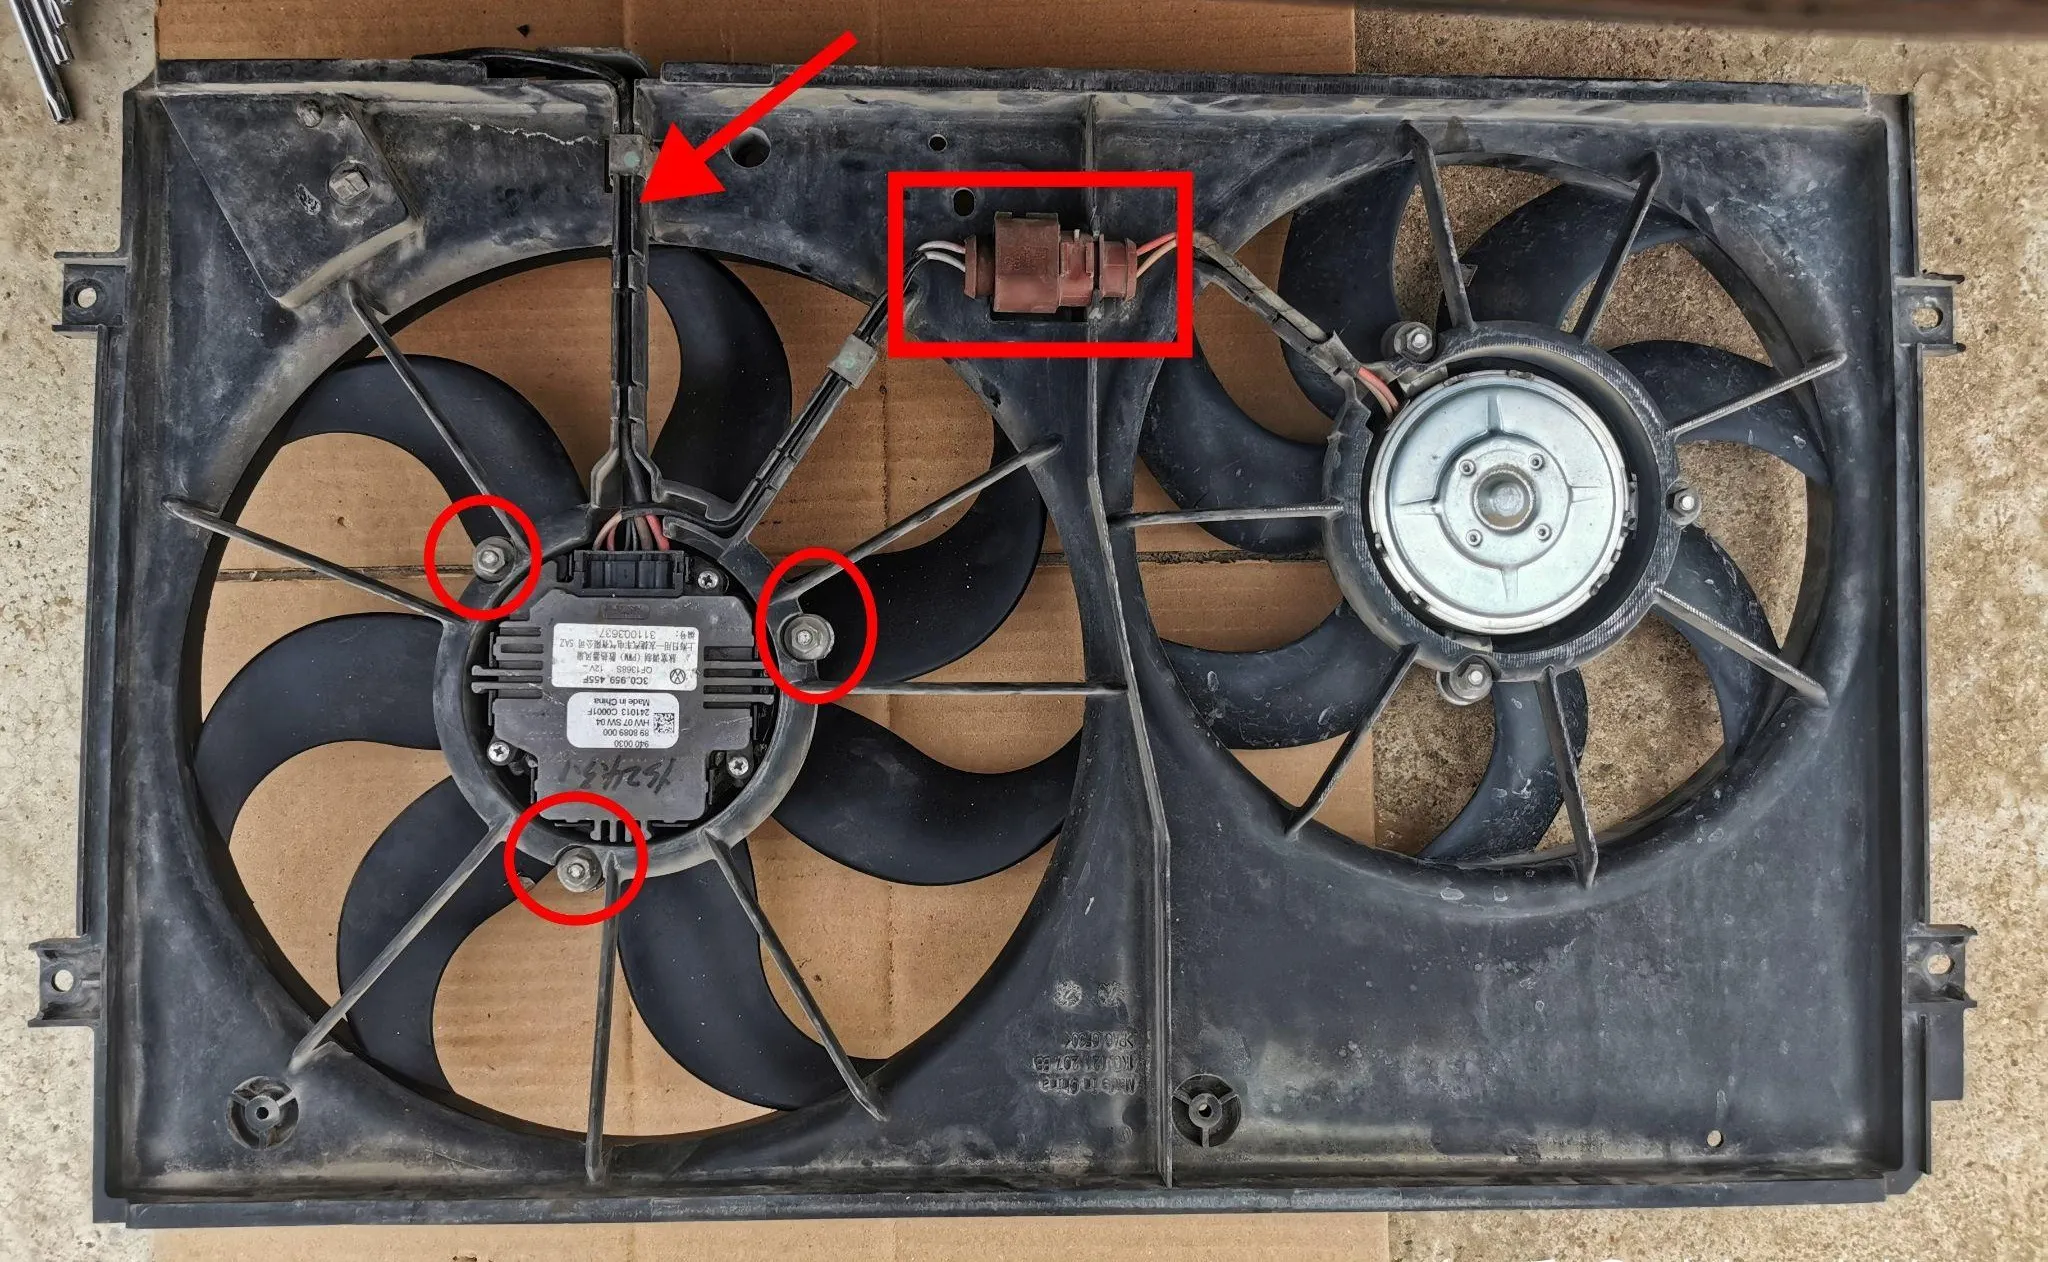
2. Remove the Large Fan
To take out the large fan, remove the three screws that hold it in place. Unplug the wiring between the large and small fans as well.

3. Inspect the Damage
Once the fan is out, check for missing blades or broken sections. Even a small piece missing can throw off balance and reduce cooling performance.
Installing the New Fan Assembly
1. Reassemble the New Unit
Install the new large fan into the assembly. Tighten all screws and reconnect the internal wiring plugs—one for the small fan and one for vehicle power.
2. Reinstall from Underneath
Slide the full assembly back into place next to the radiator. First, secure the two bottom screws while you’re still underneath the vehicle.
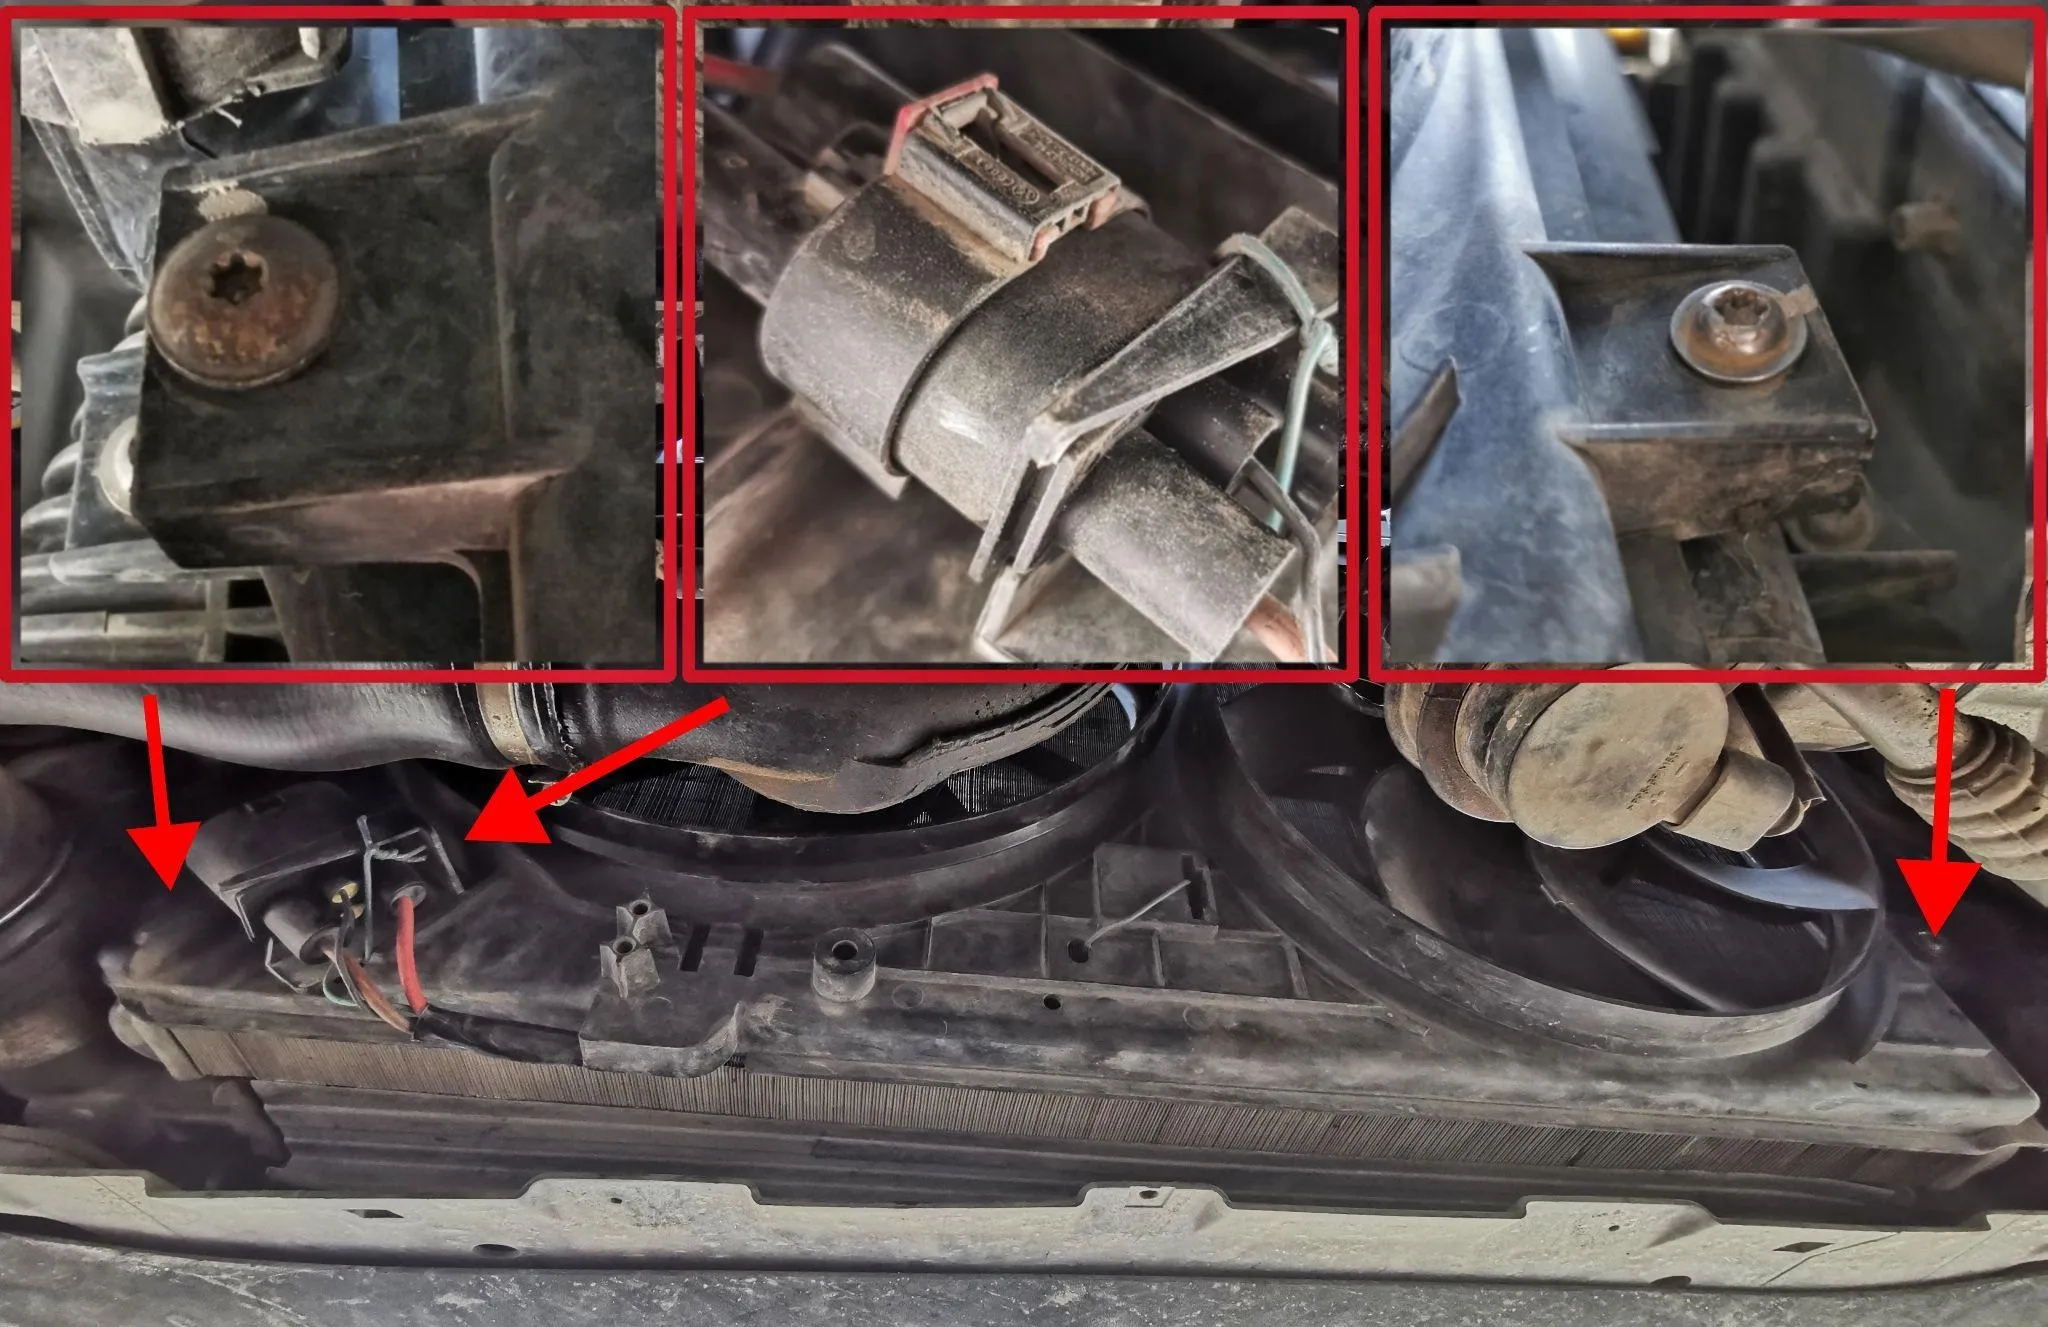
3. Reconnect Power
Plug in the main power connector securely until it clicks into place.
4. Secure Top Screws
From above, tighten the last two screws. You may need to angle your tools carefully due to tight space.
5. Test the Fan
Start the engine and let it run until the coolant reaches around 90°C (194°F). The radiator fan should turn on automatically. If it runs smoothly, your installation was successful!